

Stay up to date with products and offers
Released On 22nd Jun 2023
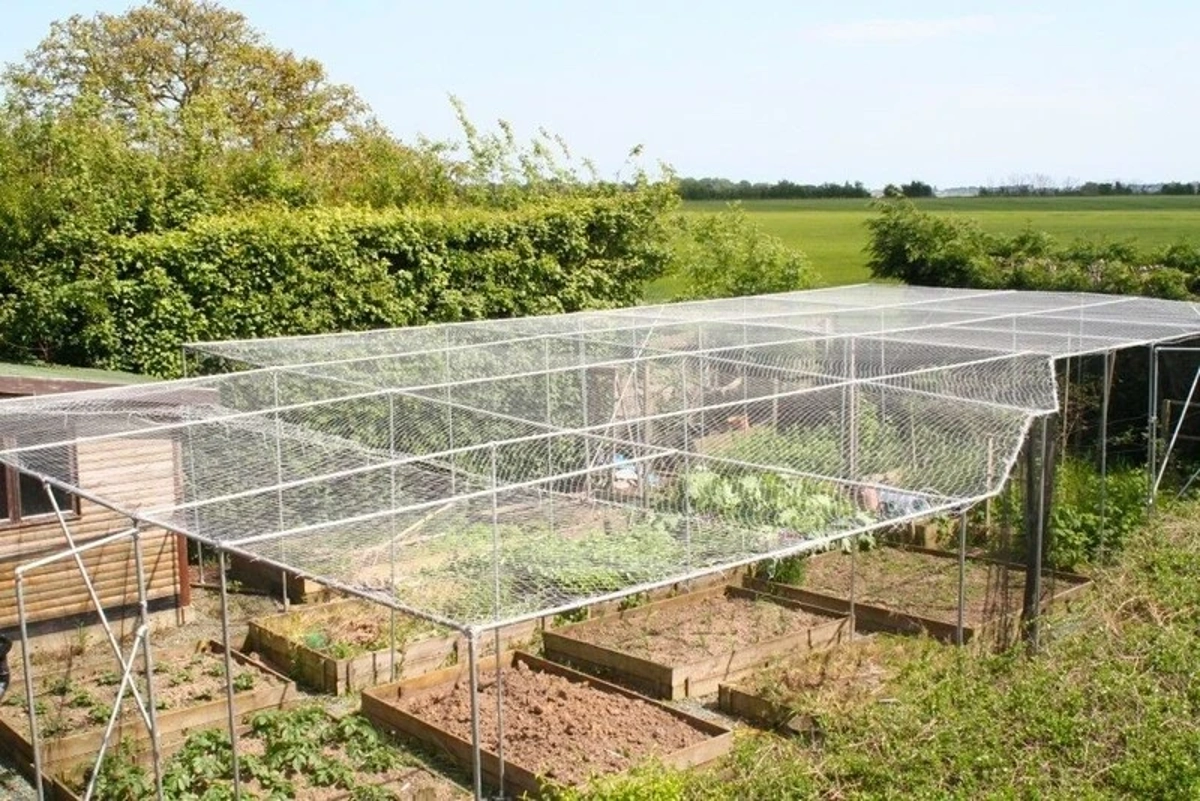
Build a DIY Walk-In Fruit Cage Frame Using Steel Tube & Interclamp Fittings
If you want a sturdy walk-in fruit cage without paying for an expensive kit, you can build a long-lasting frame using galvanised (or powder-coated) steel tube and Interclamp tube clamp fittings. This guide covers planning, choosing the right tube size, assembling the frame, and fitting netting, plus tips for expanding your cage later.
What is a walk-in fruit cage used for?
A walk-in fruit or vegetable cage is a permanent or semi-permanent structure that lets you step inside and tend plants while protecting crops from pests and weather.
A fruit cage helps you:
- Protect crops from birds and animals (e.g., deer, rabbits)
- Create a better growing environment by reducing exposure and stress
- Work comfortably inside the cage without constantly removing netting
Most cages use netting over a metal frame. A properly braced steel frame stands up best over time, especially in windy or exposed gardens.
Best fruit cage frame material: wood vs aluminium vs steel
Choosing the right frame material depends on the look you want, lifespan, maintenance, and budget.
Wood fruit cage frames
- Attractive, rustic look
- Can last several years if well maintained
- Needs regular upkeep and can weaken over time
Aluminium fruit cage frames
- Lightweight and easy to move
- Doesn’t rust
- More likely to flex or get damaged than steel, especially in exposed sites
Steel fruit cage frames (galvanised or powder-coated)
- Strong, rigid and long-lasting
- Better resistance in windy/exposed locations
- Low maintenance, especially with powder coating
- Higher initial cost than wood, but excellent long-term value
DIY benefit: Building with steel tube and clamps is often much cheaper than a manufactured walk-in kit for the same strength and size, and it’s modular, so you can upgrade it later.
How to build a durable walk-in fruit cage from steel tube and Interclamp fittings
1. Plan your fruit cage design
 Start with the size of the area you want to protect and work backwards from there.
Plan:
- Overall length and width
- A comfortable roof height (enough to walk inside)
- Door location and opening width
- Bracing points (especially if your site gets wind)
Tip: Sketch it to scale. It helps you calculate:
- Total tube length required
- How many fittings you’ll need (corners, tees, bases, braces)
Ground stability: Allow enough length on each upright to drive at least 50cm into the ground for strength and stability. Mark the insertion depth with coloured tape so each post ends up level. A spirit level is essential.
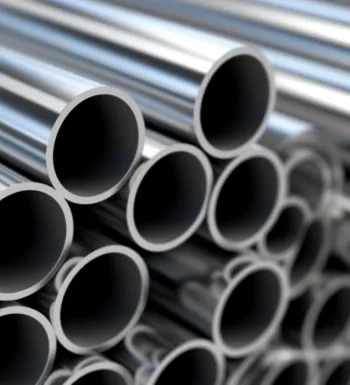
2. Choose the right steel tube size
Galvanised steel tube is available in clamp-compatible sizes (for example: A27, B34, C42, D48, E60).
For most garden fruit cages, A27 (26.9mm diameter / ~¾ inch) is typically ideal: strong enough for a rigid frame while keeping fittings and tube manageable.
If you need help matching tube size to fittings - or want tube cut to exact lengths - mention it to us and we can help.
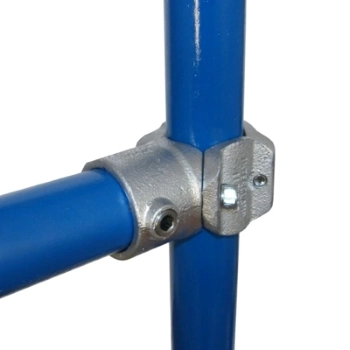
3. Pick the Interclamp fittings you’ll need
Interclamp fittings are designed to grip the tube and create a rigid frame without welding.
Common fitting types for fruit cages include:
- Corner fittings for roof corners
- Tee fittings to join uprights to top rails or mid rails
- Three-way corner clamps for two 90° horizontals plus a vertical upright
- Base plates / railing bases where you want the frame to sit on the ground rather than be driven in
- Swivel fittings where you need angled bracing (useful in windy sites)
Assembly tip: Most builds need only an Allen key for tightening.
4. Assemble the frame (work in stages)
Build in stages so the frame stays square:
- Set upright positions and check squareness
- Fit top rails and corner joints
- Add bracing where needed
- Check everything is level before final tightening
If your cage is large, add mid-rails and/or diagonal bracing to reduce flex.
5. Fit netting securely (to stop animals digging under it)
Use cable ties to fix netting to the frame. For extra protection:
- Dig a shallow trench around the perimeter
- Drop netting down below ground level
- Backfill the trench to prevent animals from pushing underneath
Netting tip: Choose mesh size based on your pests (birds vs butterflies vs larger animals).
6. Extend your fruit cage later (easy with clamps)
 One of the best parts of a clamp-built cage is how easy it is to change. To extend your cage:
- Swap specific clamps to create new junctions
- Add more tube sections and rails
- Use retrofit fittings where needed
There are even retro-fit clamps (for example, the 117Y Retro-Fit clamp) that allow you to add new joints without dismantling the existing structure - ideal if you expand in stages.
Customer project example: Peter Guile’s DIY fruit cage
One customer, Peter Guile, built his fruit and vegetable cage using 72 pieces of 3m long A27 galvanised tube and various A27 Interclamp fittings to make his design come to life:


Here’s what Peter has to say about his project and experience using products he sourced at Fixings & Fittings:
“Connectors and pipe from Fixings and Fittings gave me the perfect, lowest cost, easy solution for my new fruit and vegetable cage.
"I used standard length pipes, as I have a power saw. Only an Allen key is required to assemble the frame, and my netting was easily fixed with plastic wiring ties.
"With 5cm netting on the roof to avoid snow problems and standard railing bases, my cage simply rests on the soil.
"What made the whole project even easier was the service from Fixings and Fittings, which is as fast, friendly and helpful as you will find anywhere.”
Need help planning your cage?
If you’d like advice on tube size, fittings, or a parts list for your design, contact our team on 01460 261213 or email [email protected].
FAQ
What size tube is best for a DIY fruit cage?
- For most walk-in garden fruit cages, A27 (26.9mm) steel tube offers a strong, rigid frame while keeping costs reasonable and fittings easy to source.
How deep should fruit cage uprights go into the ground?
- A good starting point is at least 50cm into the ground for stability. In soft ground or windy sites, consider deeper insertion or using base plates and additional bracing.
How do I stop animals digging under the fruit cage?
- Bury the bottom edge of the netting: dig a trench around the perimeter, drop the netting below ground level, then backfill the trench.
Can I extend my fruit cage later?
- Yes - tube clamp frames are modular. You can add more tube and swap fittings. Retro-fit clamps can help you extend without dismantling the existing frame.
Is a steel fruit cage better than aluminium?
- Steel is generally more rigid and wind-resistant, especially for larger cages or exposed gardens. Aluminium is lighter and won’t rust, but can be more prone to flexing or damage.